
All Agreements will come to an end, and the majority of these will Expire at a scheduled Expiry date. In this article we'll show you how to complete your Expiry Events.
If you're surrendering your Agreement instead, check out our guide on Surrendering Agreements.
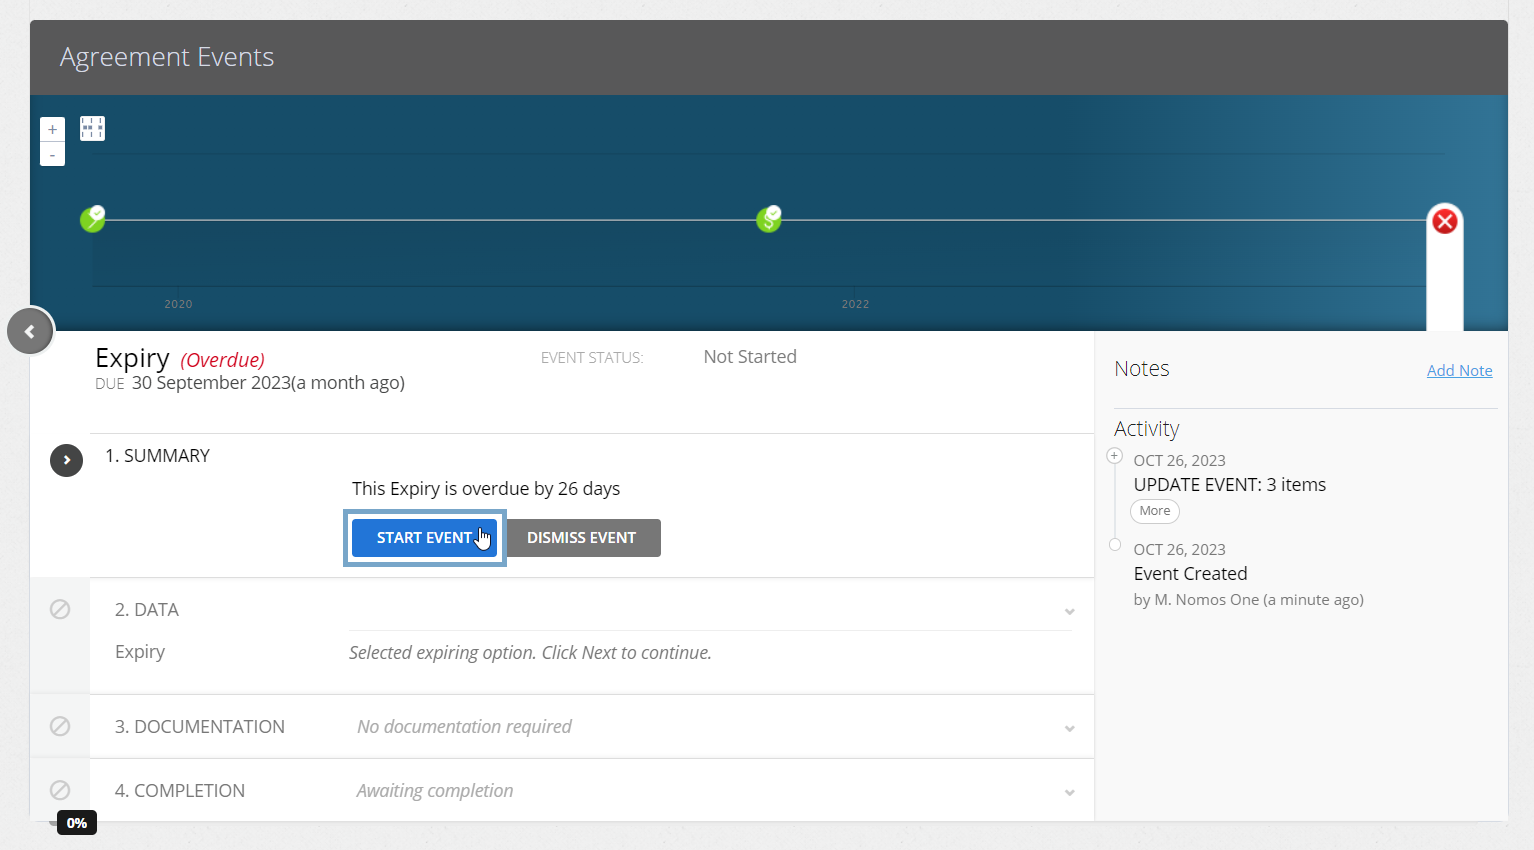
To complete the Final Expiry on the Agreement Timeline:
- Click on the Expiry Event icon, and click Start Event
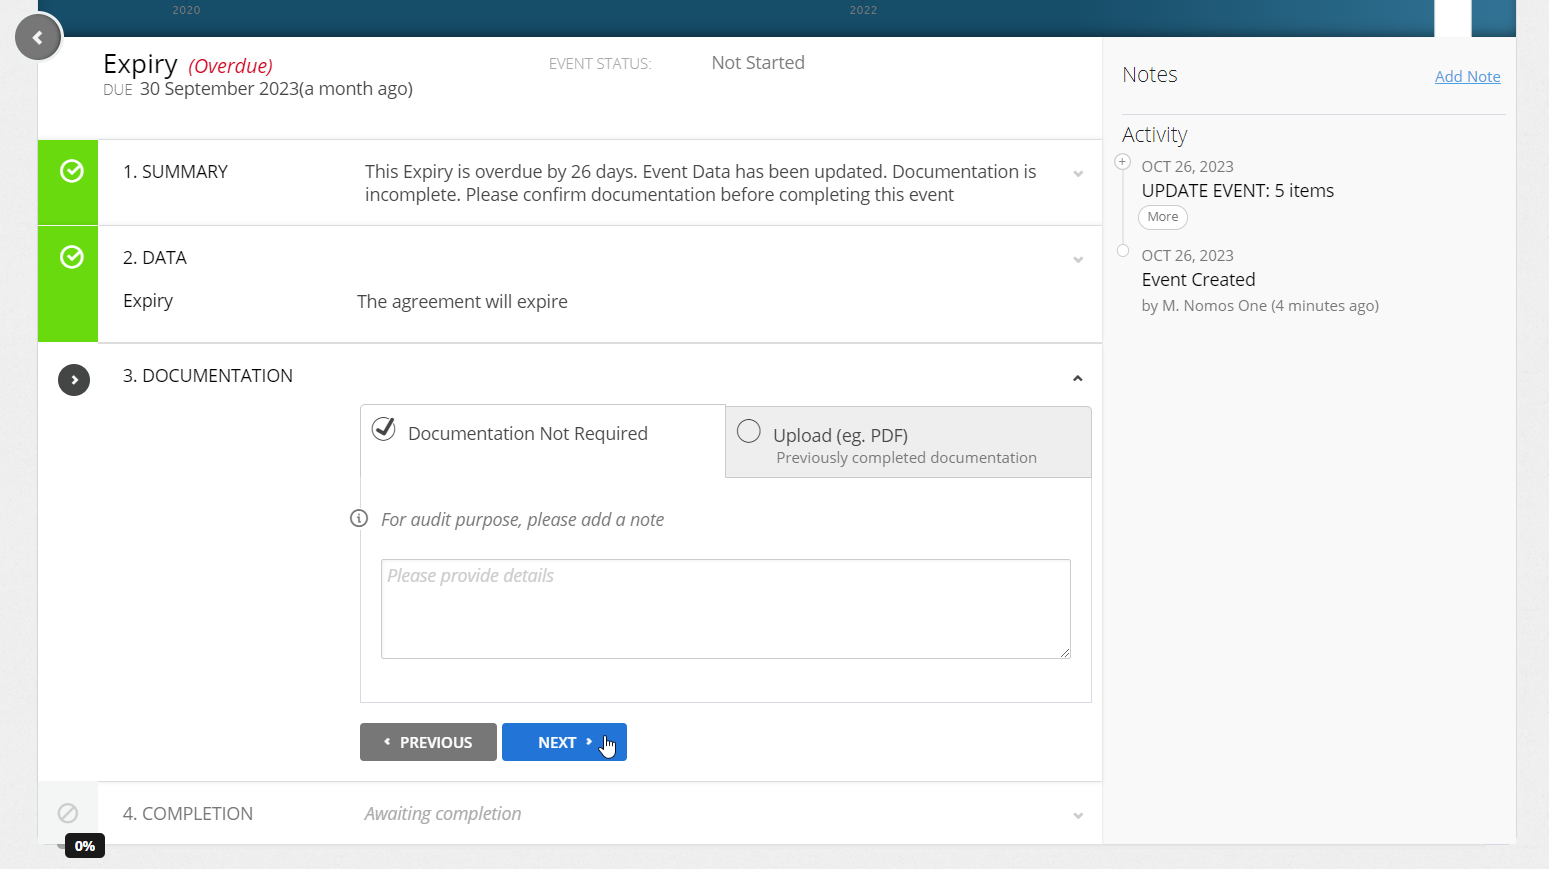
- At the Data step, you'll see the question, Is this agreement expiring? Select Yes, the agreement will expire, then click Next

There is the option to select No, the Agreement will continue and to edit Agreement Events. Check out this guidance on how to update your Expiry date to reflect different termination scenarios, and this article to learn how to extend your Agreement's term.
- Upload any supporting Documentation, or select Documentation Not Required and click Next
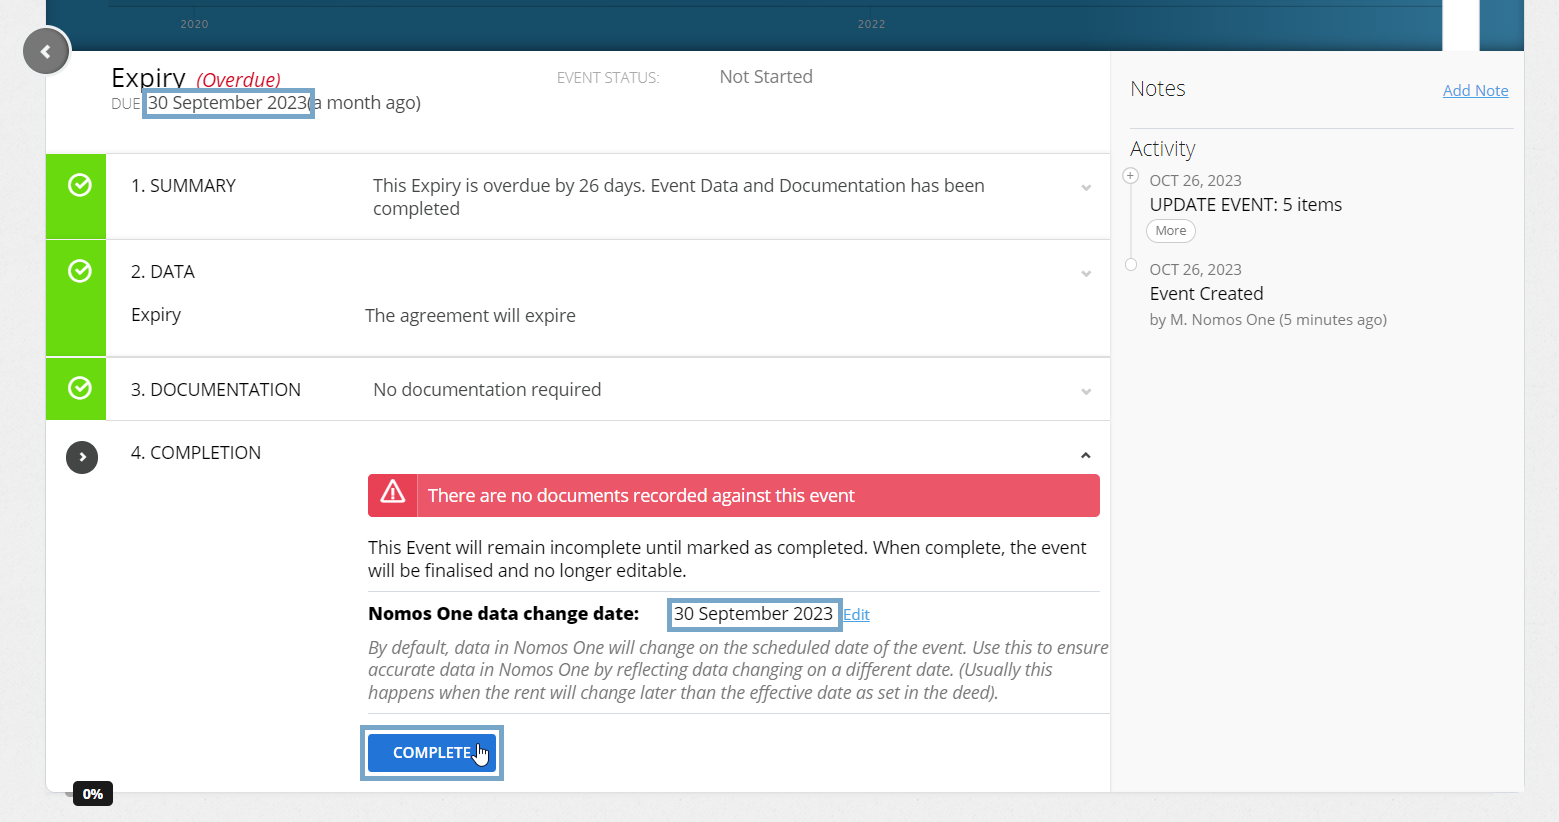
- Confirm the Data Change Date of the Event. This should be the same as the Event Date. Click Complete if this matches. If it doesn't, click Edit to select the correct date before going on to click Complete
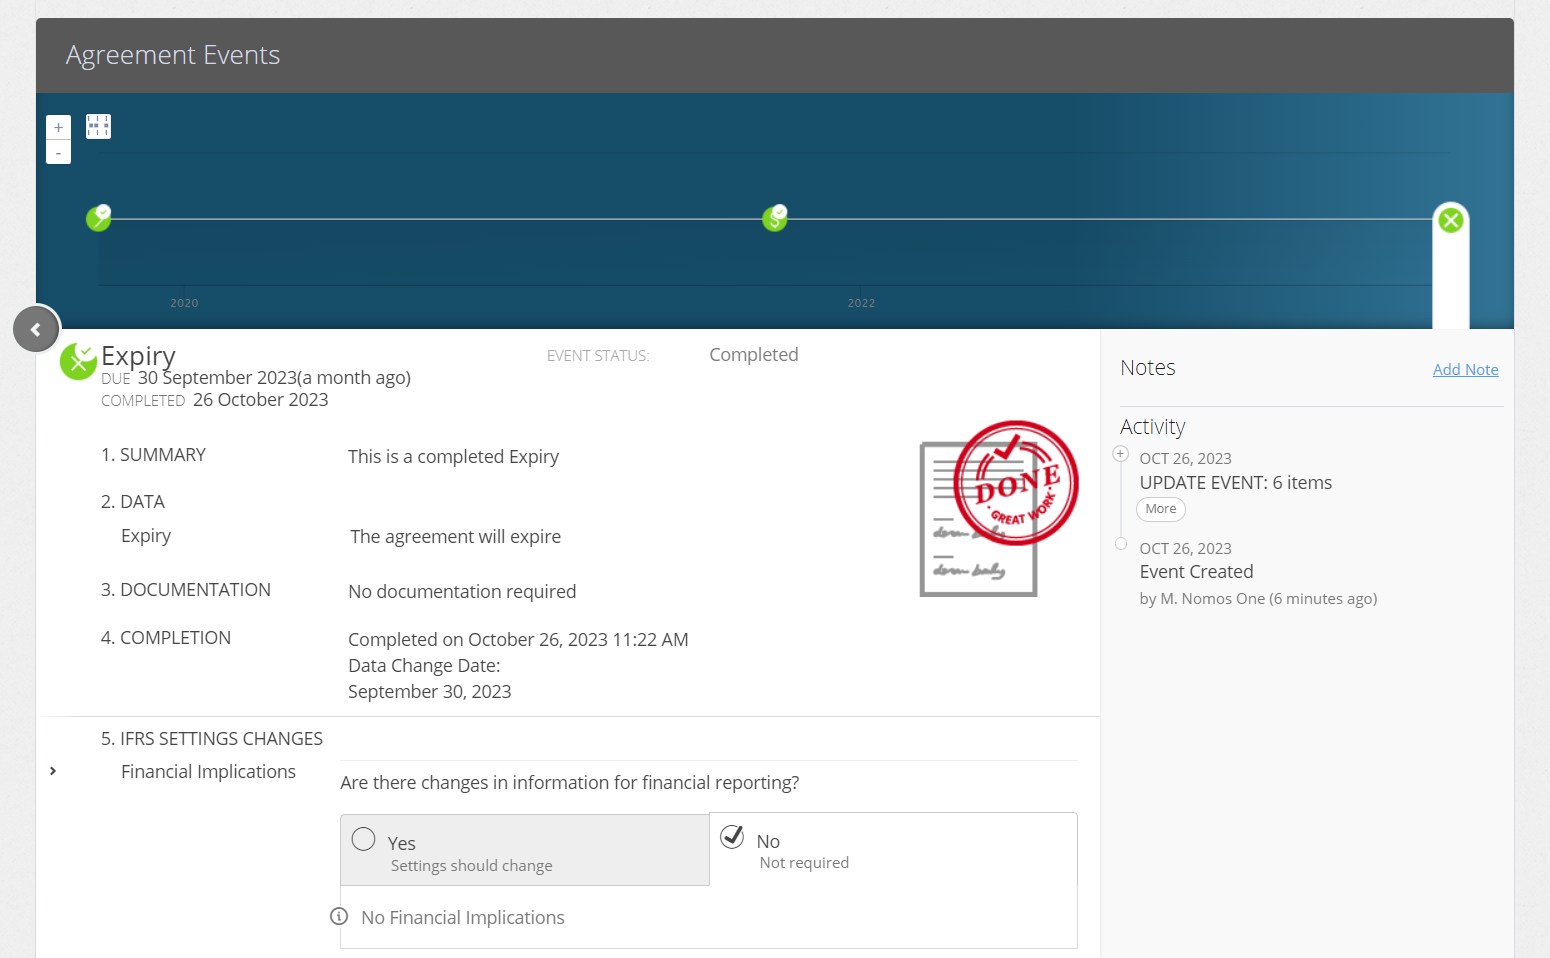
You'll see a certification that you're Done, and the event icon on the Agreement Timeline will turn green so you know you're finished!
Even though your Agreement has expired, you'll need to ensure it's kept Active for the duration of your reporting period.
Nomos One does not provide or purport to provide any accounting, financial, tax, legal or any professional advice, nor does Nomos One purport to offer a financial product or service. Nomos One is not responsible or liable for any claim, loss, damage, costs or expenses resulting from your use of or reliance on these resource materials. It is your responsibility to obtain accounting, financial, legal and taxation advice to ensure your use of the Nomos One system meets your individual requirements.